DIY & Home Improvement
Related: About this forumLow Cost DIY "Honey Extractor" for smale scale Bee Keepers
I can't take credit for the concept,
there are several DIYs using these Food Storage buckets at:
http://www.instructables.com/
(Great Site)
....but I made several improvements.
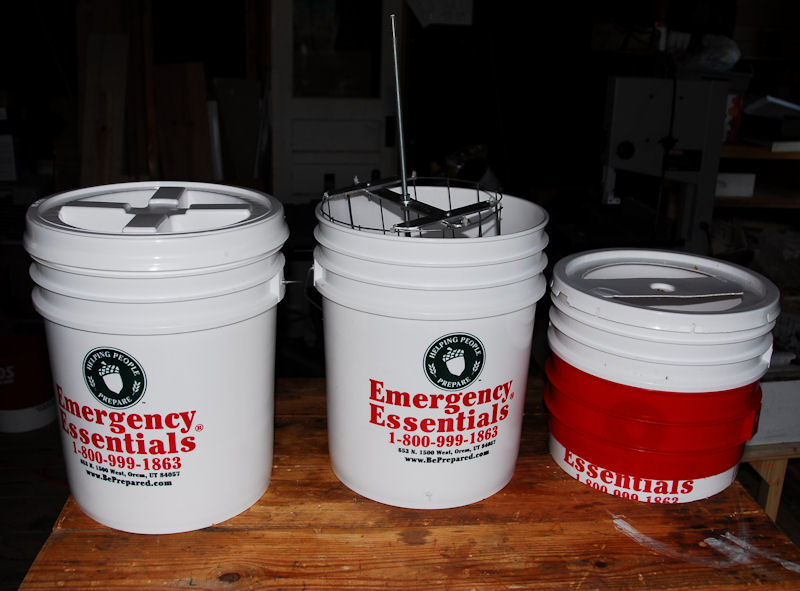
The core is 3 Food Grade Storage Buckets with Tops,
and a 3 foot threaded 3/8" steel rod available from most Hardware Stores,
6- nuts & washers to fit the rod,
and a couple of small nuts and bolts to attach the end pieces to the aluminum spreader bars.
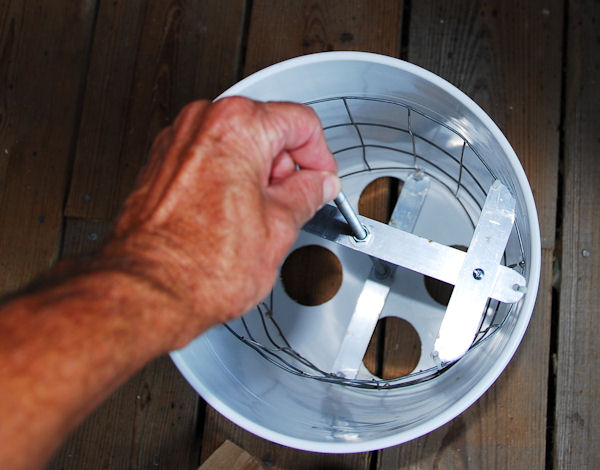
The basket is 2" X 4" welded fence wire bent into a cylinder.
Aluminum Bar Stock (available at most Hardware Stores) was used as spreaders & centralizers in the basket,
and as bottom support for the honey frames.
2- 3/8" brass grommets were used as bearings to support and centralize the rod.
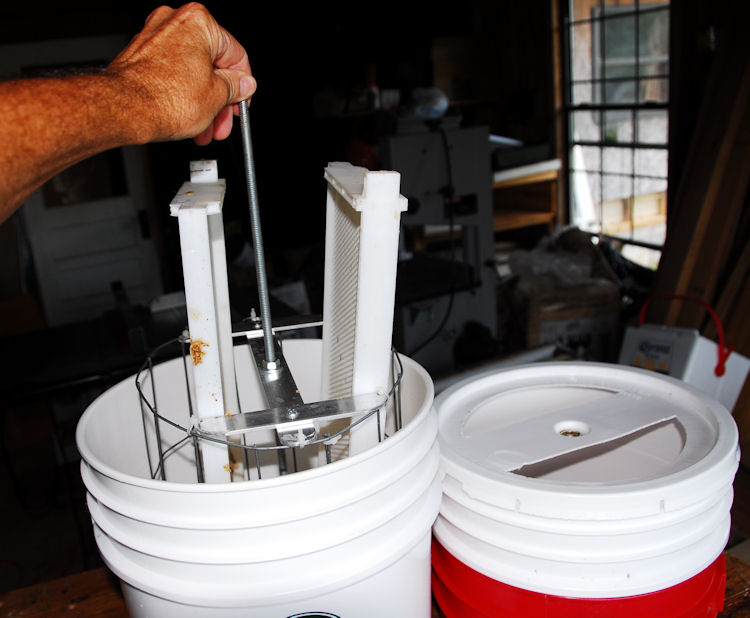
It will comfortably spin out 2 super frames at a time.
The bucket on the left has the optional Screw On top, and is used as is to catch the honey.
The Optional Screw on Top has a support ring that snaps tightly on the top of this bucket that also happens to prevent the next bucket from sliding down inside more than 2 inches when stacked.
Perfect for supporting the next bucket in the stack. You may choose to simply screw on the lid after you spin out your honey for storage.
A spigot could be added to the bottom of this bucket, but we simply poured out the honey through a screen into jars.
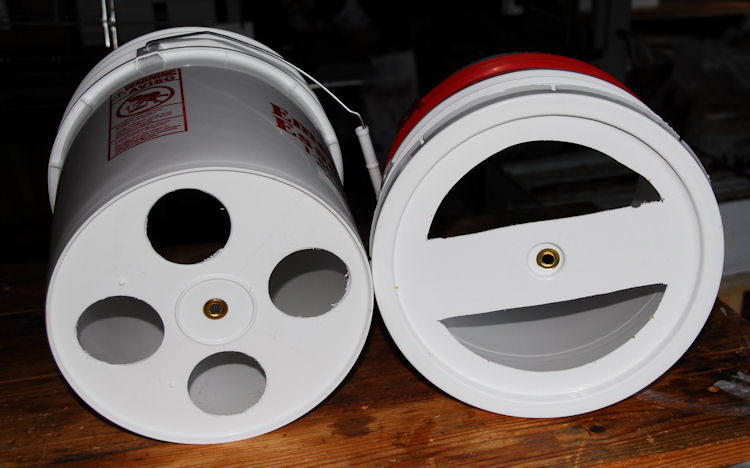
The only modifications to the middle bucket was 4- 2-1/2" holes drilled (Hole Saw attachment for a hand drill) in the bottom to let the honey run into the bottom bucket,
and a 3/8" hole drilled in the center of the bottom with a 3/8" Brass Grommet inserted through this hole.This brass grommet will support the basket assembly, and help center the rod & basket while spinning.
Use the grommet kit with the Steel Dies, and NOT that cheesy pliers thing that comes with some kits. (That thing is worthless.) You will need a long drift to hammer in this grommet as securely as possible. (I used two 3/8" extensions from a socket set).
Even with the 4 holes, the plastic bottom of this Storage Bucket was tough enough to do the job.
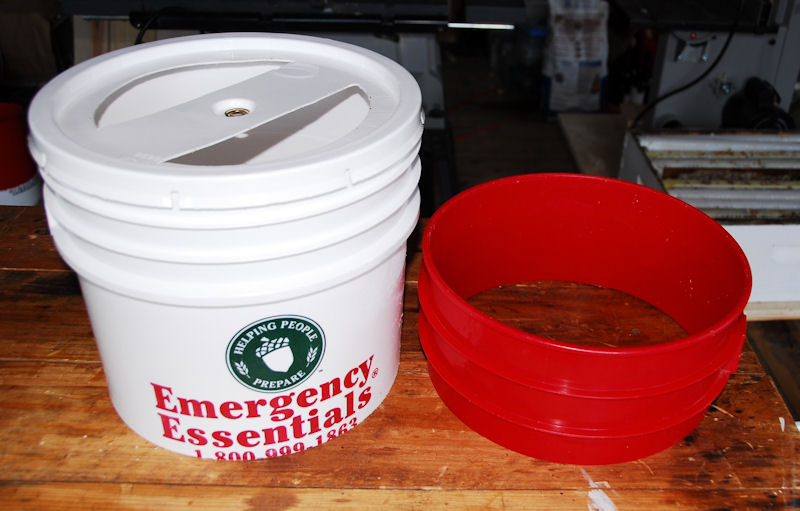
The bucket on the right is the top bucket.
I used a table saw with a finishing blade to cut the bottom 4" off,
but any saw will do the job.
The red ring is the top of a regular bucket, and serves only as a spacer. It doesn't need to be Food Grade since the honey never touches it. It is simply a spacer sleeve that keeps the buckets from stacking into each other.
The top of this bucket is a standard Snap On top, not the optional a Screw OnTop.
It also has a 3/8" Brass Grommet hammered in the center,
and two crescent holes cut for inserting and removing the frames without taking the top off.
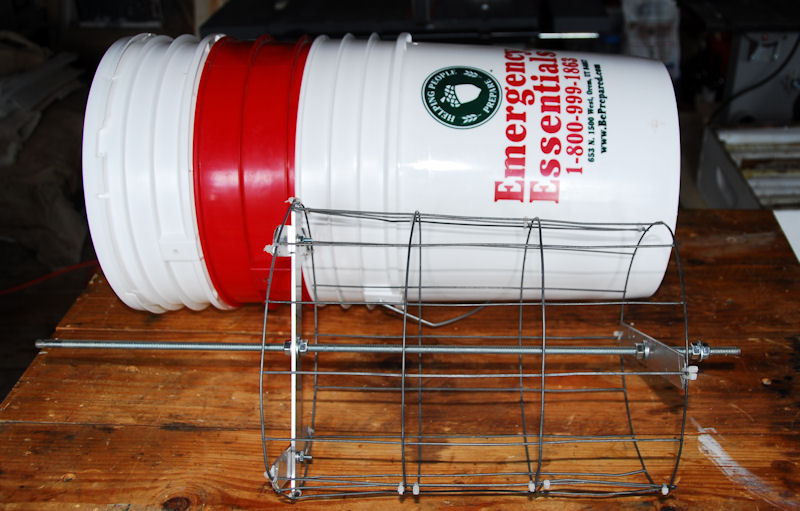
The basket is fairly simple.
I used 2" X 4" welded wire fencing, since I have plenty of that around,
but I suppose Chicken Wire or Hardware Wire, or just about anything would work.
The spreaders are made from aluminum bar stock which is available at almost any Hardware Store,
and is easy to cut and shape with a hand grinder.
Some care should be take here to make things as smooth, balanced and centered as possible.
Nylon Wire Ties hold everything together.
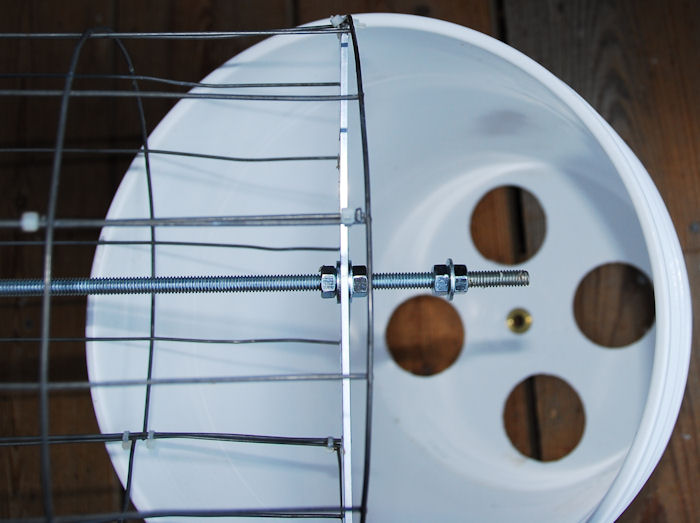
Note the extension at the end of the rod.
The tip of the rod will pass through the brass grommet at the bottom of the bucket,
but the nuts and washer won't, providing a rudimentary but effective bearing support and centralizer for the bottom of the assembly.
There is also a gap between the bottom of the basket and the bottom of the bucket so that there is space for the honey to run out through the 4 holes without being disturbed by the spinning basket.
You can make fine tuning adjustments by winding the nuts up or down the rod until you are satisfied with the spacing. Then lock all the nuts tightly against each other to hold everything in place.
The basket itself needs to be only slightly longer than 1/2 the length of the honey frame.
It is best to keep everything as light as possible.
I added the two shorter pieces of aluminum at the end of the spreader bar to keep the frames centered in the basket, and ground off the ends to match the curvature of the bucket.
Aluminum is easy to shape with a hand grinder.
(Wear Eye Protection!)
Before final assembly, the basket assembly can be balanced by supporting both ends of the rod on blocks.
The heavy side will roll to the bottom,
and weight can be added (Nuts, pieces of wire, wire ties ect.) to the top until the basket assembly shows no major bias.
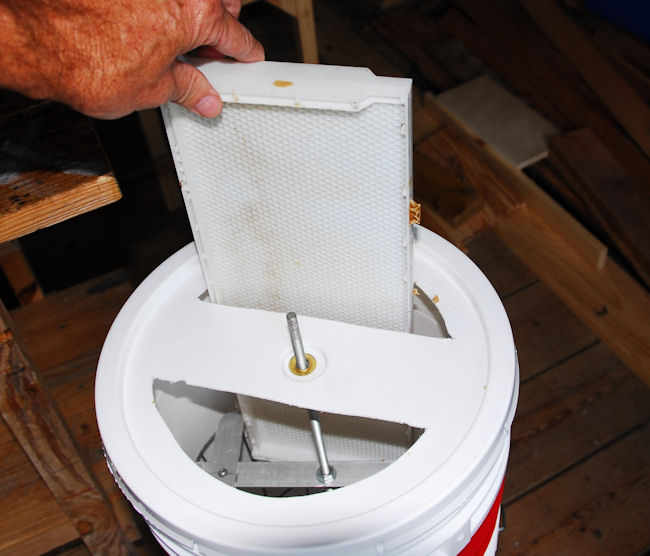
The crescent cut outs on the top lid allow frames to be changed or turned without removing the lid.
After the final assembly and spacing adjustments are finalized,
extra rod at the top can be cut off for easier use.
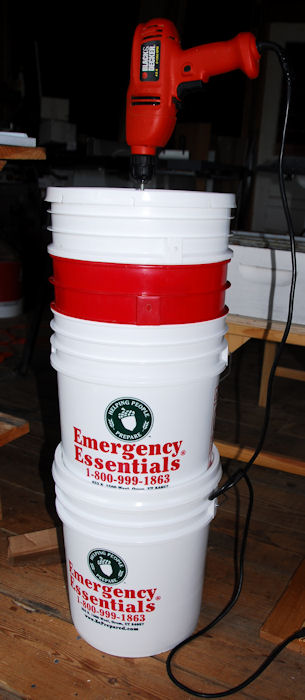
We powered our spinner with a common hand drill.
We remove the caps from the sealed honeycomb by raking them with a fork
taking care to damage the HoneyComb as little as possible.
We found no need for an expensive and messy De-Capper.
We return the spun Out frames to the hives for refills ASAP.
Frames full of capped honey are surprisingly heavy.
Start slow.
The full frames WILL be out of balance.
Turn the frames around a couple of times to empty the backsides.
As they get lighter higher speeds are possible.
We were very satisfied with the job this did.
We half believed that it would shake itself apart, but it didn't.
It was surprisingly smooth, easy to operate without a lot of mess and bother,
and showed no detectable wear after its two uses this season
resulting in about 7 gallons of Pure, Free Range (no feeders), Honey.

http://www.democraticunderground.com/1182412
 = new reply since forum marked as read
Highlight:
NoneDon't highlight anything
5 newestHighlight 5 most recent replies
= new reply since forum marked as read
Highlight:
NoneDon't highlight anything
5 newestHighlight 5 most recent replies

randr
(12,411 posts)We have several hives ourselves and the weather has been so nice the bees have no idea what to do. We are starting extraction this week with temps in the high 50's.